And being the OC (obsessive compulsive) nut that I am, I have to discuss what kimchi is first. And according to out handy dandy wikepedia:
Kimchi (Korean: 김치 Korean pronunciation: [kimtɕʰi]; English pronunciation: /ˈkɪmtʃi/), also spelled kimchee, kim chee or gimchi, is a traditional fermented Korean side dish made of vegetables with a variety of seasonings.[1][2][3] In traditional preparation Kimchi was often allowed to ferment underground in jars for months at a time.[4] It is Korea's national dish, and there are hundreds of varieties made with a main vegetable ingredient such as napa cabbage, radish, scallion, or cucumber.[5] Kimchi is also a main ingredient for many Korean dishes such as kimchi stew (김치찌개; kimchi jjigae), kimchi pancake (김치부침게; kimchijeon), kimchi soup (김칫국; kimchiguk), and kimchi fried rice (김치볶음밥; kimchi bokkeumbap).In short, it's a spicy and sour vegetable preserve... kind of... well that's one way to put it or to describe it to someone unfamiliar with such dishes. (You wouldn't believe how many types of description I have to come up with when trying to sell this to my office mates >_< )
Being that I am from the Philippines, and located in one of the smaller cities in the country, trying to follow the strict traditional recipe is, I would say, tricky. Mainly because some ingredients are hard to come by and sometimes I'm just too lazy to go to the next town just for grocery shopping. The first time I tried this, I really had to cheat or improvise on some of the ingredients. In case you're interested, here is one traditional kimchi recipe I stumbled into the time I was still experimenting >> Authentic & traditional Kimchi recipe!
Before we get started... Just one last segue:
 Gochugaru Flakes/Powder
Gochugaru (고추가루, also transliterated as go choo ga roo) is red chili pepper, dried and ground into a coarse powder. In preparing Korean dishes, just about any ground chili pepper may be used as a substitution, but be aware that several varieties of chili powder (such as cayenne pepper) can be quite a bit hotter or milder than gochugaru, and so it is advisable to add in small amounts until the desired level of spiciness is reached.
I just wanted to acquaint those who are not familiar with it. And I say it's the most important ingredient since this is what makes it, well, kimchi. I haven't personally tried using cayenne or paprika or any other type of chili powder so if you definitely can not find a Korean deli or grocery, then as what was mentioned, add in small amounts to control the taste. You can always add more but it's near impossible to fix excess.
Alright! I hope the beautiful red color of the gochugaru flakes above whetted your appetites!
Kimchi Girl's Adapted Kimchi Recipe
Ingredients:
3 kg Napa Cabbage
200 g radish
200 g carrots
3-5 stalks green onion
200 g onions
200 g garlic
75 g ginger
1 cup salt
1/2 cup Glutinous Rice Flour (or mochiko flour. sweet rice flour, sticky rice flour)
1/4 cup sugar
1 cup fish sauce
1 cup gochugaru flakes
3 cups water
Method:
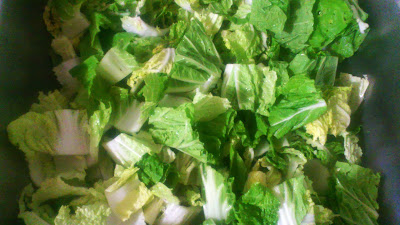
1. Cut the napa cabbage into 1-2 inch slices:
2. Wash the sliced napa twice and drain. Prepare a big enough container for the salting of the leaves.
3. Sprinkle the salt over the leaves and mix.
4. Let it sit for 30 minutes, mix and turn over leaves. Repeat 3 times (this should take a total of 2 hours)
6. While waiting for the leaves to salt. let's prepare the paste. Mix the 1/2 cup glutinous rice flour (aka galapong or giniling na malagkit), the 1/4 cup sugar and 3 cups of water in a sauce pan. Heat and stir until the mixture comes to a boil. Cook for about 3-5 minutes. The resulting paste should look like porridge. Set aside to cool.
7. Next the spices. Skin the garlic. Now you can do this manually by hand, or you can check out this video in youtube to save a little time (click here). Skin the onions and cut into cubes. Skin the ginger and cut into cubes.
8. Put the onions, garlic and ginger in a blender or food processor. Add 1 cup of fish sauce (a.k.a patis for most Filipinos). Blend for 1 minute or until pureed. Set aside.
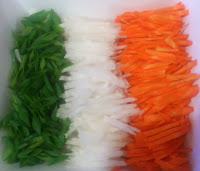
9. Chop the carrot, radish and green onions into strips. I use this slicer I bought from a hyakuen here in the Philippines. (A hyakuen is a 100 Yen shop in Japan, in the Philippines you know this as the everything 88 or 99 stores that sells Japanese products ranging from hair care to kitchen wares to toys and basically anything under the sun. They even have snacks.) Set aside.
10. Add 1 cup (or you can add more chili flakes depending on how hot or spicy you want your kimchi to be. 1 cup has a nice bite to it, but feel free to go hotter :3) to the pureed onion, garlic and ginger. Mix well.
11. If the paste is cool enough, add the chili and spices puree. Mix well.
12. Mix in the chopped veggies.
Now we prepare the actual kimchi. The steps above were simply preparation steps :3
Important notes* Try to wear gloves when mixing the kimchi. The oils from the chili and spices can cause serious irritation when they come to contact with skin. In case you do get some on your skin, simply rinse and pour a little milk on it.
1. Grab a handful of cabbage leaves and put it into the container.
2. Add a scoop of paste
3. Mix thoroughly.
4. Continue the process until all the cabbage has been coated with the paste. Push down on the kimchi to squeeze out air bubbles. Ferment the kimchi for 24-36 hours. Or, alternatively, you can eat it fresh. Though I myself prefer to have it fermented first. :3
And there you have it folks! The Kimchi recipe I use for the kimchi I sell to people at the office.
I hope you enjoyed this and please leave a comment if you have questions, requests, and what have you.
Happy Eating!


No comments:
Post a Comment